
On the MultiCam project I am trying my best to use every trick in the book... to use the router and other CNC tools in every way imaginable.
I don't use meshes created by others often, and when I do I always try and modify them in some way in order to create something original to the project I am doing. Lots of folks use 3D models off the web however as they are a great way to save time if you can locate some well built files. The nicest files I have found (at a reasonable price too!) is at 3dmodelclub.com. I ordered up six of them late this afternoon and my order was processed within a short time even though I was a new account. Downloading the files only took a few more minutes. Then it was time to have some fun. Since the room was to have a nautical theme, all of the files were of similar topic. The first file was of a group of fish...

There will be six panels which will be 'riveted' to the walls of the nautical themed board room. I want them to look as if they are cast iron and aged in a similar manner as the rest of the room when we are done. I built a base panel in EnRoute complete with a rivet in each corner to 'hold' it securely on the wall. I added one of my bitmap textures called 'splotches' to create some surface aging. I saved this as a template for the six panels. Then I opened up a STL mesh file I had purchased from the 3D Model Club online. The files are very large and of good detail. I sized it and positioned it to fit above the panel and below the top of my 2" 30 lb Precision Board. Then I selected both and combined the two files, then deleted the mesh and tool-pathed the file. As easy as that the file was complete and ready to route.

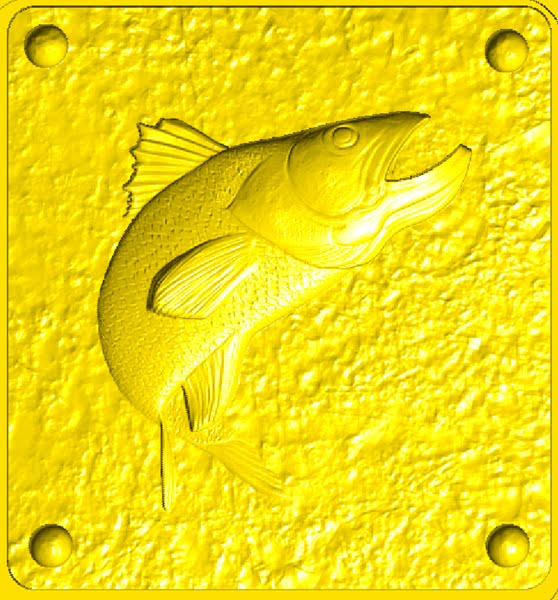
The second file was of a jumping fish. Once again I opened the template and positioned and sized the STL file, then combined them and tool-pathed the file. They measure about 24" x 22" and will look really sharp when they are finished - especially with the indirect lighting washing down over them.

While I was making the second file the MultiCam was busy whittling out the first.

Another piece of the complex puzzle that is the MultiCam Board room is now well under way. The ceiling was being sprayed today and tomorrow with the fireproofing meaning we can get into the building once more on Friday or Saturday at the latest. I can hardly wait to continue the build.
-dan