WELCOME!


It is hard to believe that it was only seven years ago I witnessed a CNC router in action for the very first time. I was fascinated and simply had to have one! Although I had been in the creative end of the three dimensional sign business for most of my life I didn't really know what I would do with one - but I just knew it could do fantastic stuff.

Through extensive research I quickly found out that with the relative simplicity of EnRoute, CNC routers were capable of just about anything imaginable. This journal will chronicle that journey to date and continue each week with two or three entries as we continue to explore just what is possible with this wonderful software... -dan

Sunday, March 28, 2010

GEARING up for a trade show...

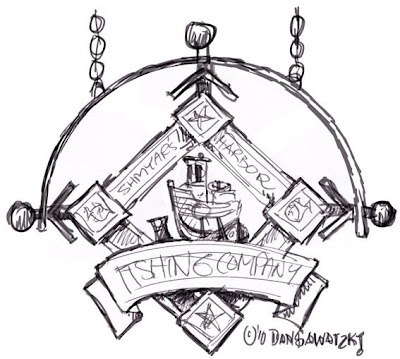
With the upcoming international sign trade show coming soon in Orlando, Florida I needed to produce a panel for the EnRoute display booth. The panel would showcase my DVD of 101 bitmap textures while also providing some eye candy of what could be done with EnRoute. I struggled to come up with an image that showed the textures and also that they could be produced on a machine. As I thought about these things the solution became obvious... the panel had to feature textures and a simple machine of some sort... GEARS!
Our sandblasted woodgrains are the most popular bitmaps so they had to be included. I also use one called splotches a lot to produce a well aged and used metal. I drew up two quick sketches and when the ideas was far enough along it was time put to down the pen and go into EnRoute to produce the needed vectors. The vector file took about 30 minutes to produce. The shot below is before I replaced the straight vectors with my famous wiggly lines.
Then I built the reliefs and imported the bitmap files to create the textures. This only took a few minutes to produce the results I was after. Here's a screen capture just before I tool pathed the file and sent it to our MultiCam for machining.
Onc the router was done I textures the edges of the big panel with my air powered die grinder. It only took a few minutes and instantly added believability to the panel no matter what angle it was viewed from. The small gear was glued on prior to painting. I then primed the panel and added the base coats of color. I first put on one medium brown glaze on the wood before painting the metallic colors. Once they were dry I added a dark chocolate glaze over the entire sign and lastly glued on the big gear with epoxy.
The end result is subtle yet is still a screamer compared to most flat signs. I'm hoping it will catch everyone's eye who visits the EnRoute booth.

-dan

Saturday, March 27, 2010

Instant age.

The primer was my last opportunity to add a little more texture to the sign. Coastal Enterprises primer goes on with the texture of cream. We apply it by hand with a brush. For areas we want more texture we will apply a second coat with a small brush and then purposely leave rough brush strokes which dry without flattening out. It's a cool technique.
The painting is all done with acrylic paints by hand. Once the base coats are on we flooded the sign with a paint glaze and then wipe off the excess judiciously leaving bits of color on the low areas and on the edges. It adds age, character and heightens the illusion of depth. It also makes our signs look hand crafted rather than looking like they came off a machine. Once the sign was done I set it outside to do a photo shoot. The mountains out back of my shop provided the perfect backdrop.
I was delighted with the result to say the least. The sign was finished the day before it was to debut at a trade show. I'm happy to report the effort was well worth the trouble!

-dan

Sculpting details

Once the clamps came off I went over the sign with an air powered die grinder. I first evened things up and then added a subtle texture over all the edges to match the texture which we had programmed into the files with EnRoute. Once the sign was ready for paint I drilled holes in the sign to accommodate the brackets. Everything was test fit to make sure it looked right, then glued to make it permanent.
Holes were burned through the support pipes for the vertical rods and everything fit and welded to make the sign secure. the last two balls were welded onto the rods after they had been cut to final length. The third rod was welded to the post to make the sign REALLY secure. There was no fear of this sign coming down in the wind. Then I used some sculpting epoxy to form the barnacles, fish and starfish which added the nautical flavor I was seeking. I could have routed the bulk of them but hand sculpting them added a randomness and hand sculpted look to the sign which I really liked.
I mocked up the whole sign once more before paint to make sure it all looked right. I decided to make the ship into a whole scene complete with rocks, gravel and some scrap lumber on the ground. The barrel and other tools were also sculpted into the scene. The boat was held up securely with two sturdy steel rods drilled into the hull of the boat and down into the sign.The epoxy sculpting medium was allowed to dry overnight. Then it was time for paint.
Stay tuned...

-dan

The sign comes together quick

The routing files for the Shmyer's Harbor sign consisted of four pieces. I built each relief separately, then added textures to key pieces. Then I 'floated' them separately until things looked right rendered. Before I merged them I made duplicate copies of the scroll and sign, flipping them so they matched back to back. The lettering was also duplicated and applied to each so it read correctly. They were stacked to best fit on our piece of 1.5" thick Precision Board. Tool-pathing took only seconds once we had everything arranged correctly.
The file was sent to our MultiCam and the machine was set into motion. While the machine was routing I started in on the welded steel brackets for the sign. It would have been ideal to simply cut some large angle iron for the corner pieces but I didn't have any of that on the steel rack. Instead I cut two lengths of 4" square tubing and then split it to give me the right angle pieces I needed. Some short lengths of 5/8" steel bar was pushed through a hole I burned with the plasma cutter and then welded on. A hollow steel ball was welded onto the end of two of the rods. The other two were kept over length and would be finished off after the assembly and mounting of the sign.
Once the pieces came off the MultiCam I glued everything up. The sign was 6" thick at it's thickest point - more than enough to accommodate the little boat. It took a forest of clamps to hold everything in place while the glue set.
Stay tuned for final assembly and paint...

-dan


Monday, March 22, 2010

Home for the boat - at last

Well over a year ago I fabricated a little boat as a name plaque for one of our attendees at our Sign Magic Workshops. While I was at it I routered a second copy as a sample for our shop. I'll post a how-to another time on that project. It was my intention to incorporate the little boat (named after my wife Janis of course) into a larger sign at some point. But like all good intentions the project languished on a shelf - until recently.
As I often do I was sketching while relaxing and watching TV. Inspiration hit me and I came up with a cool idea to create a sign which incorporated the boat. I would use a square shape but tip it 45 degrees and then put a scroll in front. The magic however was the bracket I would use to hold up the sign. Ultimately I would change it slightly from the sketch but the idea was good enough to proceed.
I created the vector file in EnRoute using the drawing tools. As I often do however, after drawing the perfectly square and straight lines I used the freehand tool to go over them and wiggly them up some - deleting the straight lines afterwards. The design was developing some character already.
Next up was creating the reliefs and the necessary textures. Stay tuned...

-dan


Sunday, March 21, 2010

Shake, rattle and roll

The streetcar glued together quickly. There was still a little hand work to do but it didn't take long. The Precision Board sands easily and in only a few minutes to was ready to mate with the rest of the sign.
This was just a small sample sign measuring about two feet square and six inches deep but the detail I was able to achieve was incredible!
The electrical pickups were fashioned from welding rod. I painted on the base coats of color during brief periods during the day allowing it to dry between. A dark red glaze was added to the bottom to highlight the textures. The last touch was a little gold leaf to add some bling.

In a period of only three days and only using spare minutes I had created a wonderful sample piece for our trade show display.

-dan


Multi-tasking

Even after more than four years of running our MultiCam router I can't resist sneaking into the router room to watch it perform it's MAGIC. I know it is all based on math formulas but I find it incredible that I don't have to think of all that. I dream up my ideas, create my files and push start on the router. Then the MAGIC happens every time!


While the machine was busy I went back to my office and stated work on the next file needed for the sign. The vector files were created in mere minutes using the drawing tools in EnRoute.
I built the relieves needed and then added the bitmap files I had created to generate the textures. Its as easy as importing the files, entering in a numeric value and hitting enter. By the time the streetcar was done on the router another tool-pathed file of the sign was ready to start.

While this portion of the sign was running I started in on assembly of the streetcar.

I'll post pictures of that progress next time...

-dan


It starts with a sketch

Most every project we do starts with a sketch. This one was done while I sat on our couch watching TV with my wife. There's far too many commercials on these days but I put them to good use. The sketch was done in about ten minutes.

Using the sketch and historical photographs as reference I created the vector file in EnRoute. I imagined how I would break the piece down for cutting and then after the pieces came off the router I would glue back together again.

Then I built reliefs of each piece of the assembly individually, merging them at the last minute to make my routing files It only took about an hour to create this file. Here's a screen capture I took just before I tool-pathed the file.Using the powerful tools and imaging of EnRoute I could clearly see how it would look when I was done.

This was going to be a very cool little sign. Stay tuned...

-dan

Friday, March 19, 2010

Finishing touches


I first painted the dimensional pictorial in bright colors. It didn't look natural for it was a bit garish, but I had just the cure. I mixed up the most awful glaze - a mix of khaki and chocolate and flooded it on up to the tree line of the mountain. The using the soft rags I judiciously wiped it off once more leaving it in the cracks and crevices of the sculpture. It immediately toned down and brought it into the context with the sign. It looked a LOT better in a short time!

The gold leaf only took a short time and instantly added the sparkle the sign needed. Today after allowing the sign to dry for a couple of days we moved it out of the shop and to the site. The client was most pleased and so were we !!!
The shop seemed empty with the sign now gone... but we were ready with the next exciting project. Stay tuned...

-dan

I've never followed directions well


We routed pockets into the sign to make it easy to locate the separately cut letters when we glued them on. Most sign makers paint everything separately, then glue it together, but true to form we do it a little differently. I like to glue while all the materials are in their raw state. Routing the letters separately allowed me to build up the thickness of the sign in an economical fashion. Then after gluing I like to add just a little more texture with the heavy bodied primer. We use Coastal Enterprises FSC-88 WB primer. WB stands for water base. It goes on with the thickness of rich cream and doesn't shrink or crack as it dries. The gold leaf will have that little extra sparkle on the texture. Then we painted our base coats on the sign with a top quality acrylic paint. The yellow/tan was first. Then using custom mixed acrylic glazes we started in with a reddish brown flooding the woodgrain texture, then wiping it off with soft rags, leaving the glaze in the lower areas.
The next step was a dark chocolate glaze with a touch of dark cherry metallic (for that little extra sparkle) it too was flooded on and then wiped off allowing the lighter shades to peek through for a rich wood look.
The sign was coming along quickly now. I painted the borders and top with two coats of chocolate, saving the best parts for last...

Stay tuned...

-dan

The world is NOT flat!


While the whole sign world around me works hard to make everything perfectly flat and smooth we take a radically different approach. I LOVE TEXTURE! This sign was so massive it begged to look like it was hewn from a solid timber. Using a die grinder it was easy and quick to make the piece look like I'd used an old fashioned adze to cut it to shape. I extended this treatment to the sides, rear and borders on the sign. In less than an hour the effect was magic!
Using the same tool I carved the mountains into the cutout shapes I had created in EnRoute and cut with the router. I used rough broad strokes for the mountain rocks and glaciers and short vertical strokes for the closer trees. It didn't take long to prepare the sign for the next step.

We used a Sculpting Epoxy to form the missing shapes of the mountains, form the tree line and add in the rows of crops. It is like the plasticine we used as kids - only this stuff gets rock hard in about 3 hours. It's MAGIC!

At this point we were ready for primer... stay tuned...

-dan

Project just finished!


I get most excited about the projects underway in our shop. Today we installed the latest and it's a cool one. In the next few posts I'll show how we went about using EnRoute, our multiCam router and a few other tools to pull it off.

It all started with a concept of course. Once I had the idea firmly in my head I created a vector drawing in Illustrator and then imported it into EnRoute. The vector file looked looked this...
Then, step by step I built up the shapes and added my bitmap textures. Pockets were created for the letters which were built separately. The diamond shapes were done the same way. The file was fit into a 1.5" 4'x 8' sheet of 30 lb. Precision Board HDU. Then five more layers of 1" thick HDU were built as cutouts which would be laminated to the back of the sign. Cutouts were machined into the middle sections to allow a 3" x 3" welded steel frame to fit inside with two legs protruding out the bottom for support. Running the detailed files took 23 hours of router time. I did other things including sleep. CNC routers are marvelous tools!

Stay tuned for the next steps on this project...

-dan


'T' is for texture!


It wasn't long until adding one texture to a routing file was old news. I wondered if it was possible to add multiple textures... and yes it was! With EnRoute textures are relatively simple. Simply define a shape with a vector line, build a profile, then overlay a bitmap image over the shape, select both and insert a numeric value, and with one click texture is created. Black does nothing, white raises by the amount specified and various shades of grey are in between. Repeating the steps and combining the building pieces make anything I can imagine suddenly possible.

It was back to the drawing board and experimentation stage as I struggled to figure out what worked and what didn't. We filled the dumpster once again with failed experiments, but also built a sizable display board with what did work. This was fun... much more fun than working!

Each successful sample provided a test bed for our painting techniques too. We were using all water based acrylics and applying everything by hand with brushes. In doing so we found we could recreate anything we saw around us... and much, much more. We could create anything we could imagine!
This was WAY more fun than working!

-dan


Welcome to the 3D world of routing!


Welcome to my routing adventures with EnRoute! It's hard to believe that it was only a little more than four years ago I started on this journey. The first time I even saw a CNC router was at a trade show a few months previous. I knew I needed one in an instant but I didn't know exactly what I could do with it at the time. I searched high and low, made countless phone calls to sign folks across North America but I could find no one who was doing the type of 3D textured work I wanted to do. The routers were capable and so was the software but I was on my own in figuring out just how it would come to be.

When the MultiCam techs set up the machine they showed me how to operate it. It looked daunting but thankfully they left a set of detailed instructions in how to turn it on, warm it up and put it through basic maneuvers. I had the EnRoute manual as well to guide me. But I'm not very good at manuals. At that point I was green for I had never even worked with vector files previously. I was in for the learning curve of my life!

We had no paying work scheduled for the machine. I wasn't about to put a customer's job on the table until I could make the machine do what I wanted. I decided to start with the letter 'a'. With the manual open and me painfully reading, then trying each step, I built the files, we'd put a piece of pink insulation foam on the router and we'd give it a go. We filled our garbage bin with failed experiments. Eventually, once we got some experience and successes with the inexpensive foam insulation we put on some Precision Board HDU and routed our very first sample pieces. I built a 'B', 'C', 'D' and then did the entire alphabet, each different, each with a different texture. While we were at it we experimented with different paints and patinas. This was to be a learning exercise in every way possible and learn we did!

It took almost 3 months of experimentation in our spare time to get confident enough to put a paying project on the machine. By then we knew anything we could imagine was possible - if we took the time to figure it out. We were on our way in our journey and we were traveling at light speed!

Stay tuned for more...

-dan