WELCOME!


It is hard to believe that it was only seven years ago I witnessed a CNC router in action for the very first time. I was fascinated and simply had to have one! Although I had been in the creative end of the three dimensional sign business for most of my life I didn't really know what I would do with one - but I just knew it could do fantastic stuff.

Through extensive research I quickly found out that with the relative simplicity of EnRoute, CNC routers were capable of just about anything imaginable. This journal will chronicle that journey to date and continue each week with two or three entries as we continue to explore just what is possible with this wonderful software... -dan

Thursday, June 30, 2011

Short week - but lots of progress

This week was a short one on the work site of the Fox and Hound Pub.  Monday was spent in the shop. Friday is a Statuary Holiday - Canada Day. But we made the best of the three days we were there. Lots of carved concrete was completed. Lots of wire was stapled on in preparation for the next steps. Here Becky fits a piece to a post in preparation to some more concrete work.


The routed Precision Board mantle was installed and mesh was stapled on for the brickwork. I'll be welding the armature for the trees on each side on Saturday.


On the carved concrete that is dried and cured we are starting in on the base coats. Everything will get two coats of paint before we begin the glazes.  


The upper beams are now all done as is the brickwork through the hallway. We continue to push the carpenters, insulators and dry wallers. By next week we will have the green light through this entire area to proceed with our work. 


The brick work is done in three stages. First the 'mud', wet concrete is troweled on in one heavy coat. It is then allowed to set up for two - three hours. Then I do the preliminary carving, after which the ladies of my crew go over it one more time cleaning it up and brushing it of to remove the crumbles. They work to ensure the concrete has an even texture to hold paint securely and to allow for the glaze coats.


Other beams and pieces will be created on the MultiCam using Precision Board. I'll be showing the process in EnRoute in the next days. Stay tuned...

-dan

Wednesday, June 29, 2011

More GOLD!

Today I received word of two more National awards from Sign Media Canada. Our Triangle Contracting sign was the winner of the Stand Alone Sign category. To see a step by step of this project follow this link...  Today I received word of two more National awards from Sign Media Canada. Our Triangle Contracting sign was the winner of the Stand Alone Sign category. To see a step by step of this project follow this link...  http://precisionboard.blogspot.com/search/label/How-to%20excavator%20sign


In the Sign Systems Category the MultiCam Western Canada project took first place.


-dan

Tuesday, June 28, 2011

Coming up for air

Six years ago when I was first looking at CNC routers and considering just what to purchase I quickly found the choices overwhelming and confusing to say the least. It quickly became apparent that a MultiCam was at the top of the pile in terms of quality. As I talked to many people I learned what all the terms meant...  gantry, linear rails, planetary gears, spindle, servo, stepper and a hundred other terms, - all confusing at first... but now at last familiar. My local dealer helped me through the process, as eager as me to select the right machine for my needs and budget. Looking back, we made the right choices.

Now as we look forward to a new four axis machine it is equipped very much the same way as the old one. But there is one thing we chose to do differently, primarily because of the type of routing we do in our shop. While most routers are used as very fancy jigsaws, in our shop we use ours primarily for creating textures. This means the router runs continuously for long periods of time and not for short spurts as most machines would be used. 

We found that while adequate for most applications our compressor was woefully inadequate for our way of doing things. My big five horsepower upright compressor burned out in a hurry. It was time for something more powerful. Further complicating things was a single phase power source - no options there. This meant we were limited to about seven and a half horsepower. A screw compressor with a built in air dryer was the perfect solution. And it worked well. But after two years things began to go awry. Then it quit altogether. I called in the experts. As it was explained to me the compressor quickly gets up to maximum pressure and keeps up to the copious air supply needed to both cool the spindle and provide high air pressure needed for tool changes. Then it shuts down, waiting for the air to draw down. On demand it fires up again and so it cycles.

But the way this particular compressor works the high pressure air bleeds off slowly in the compression chamber, so the motor can start up without load. The trouble is the cycle completes before the air is totally bled off meaning the compressor starts under load. After countless cycles it burned our the brushes and windings. Thankfully the compressor company covered the damage under warrantee. Lucky me. But a permanent solution was needed.


The solution was an easy one, recommended by my dealer. The spindle on the new machine would be water cooled. This meant far less demand on our air supply. Research showed we could retrofit a water cooler on our old machine, not necessary for the short time we will continue to own the old router.

Even after almost six years of owning a CNC router I continue to learn lots of new things every day, both in the files I create and in the operation of the machine. It is exciting and challenging to say the least. I have no doubt this will continue for as long as I live.

-dan

Monday, June 27, 2011

No sour grapes here!

The basic vectors for the Harold Fine Wines sign were created in EnRoute. No real scale was set - as the important thing was the proportions.


Then I built the basic shapes for the crowns and added the curved lettering. This is what was imported to EnRoute.


In EnRoute I built more vector shapes, including the individual grapes and the scroll wings.


The individual scroll elements were duplicated and pulled to the side. Using the jigsaw tool it was a one click operation to create the shapes I needed, then use the original vectors to locate the shapes.


The lower scroll was created in the same fashion.


 The grapes were created as domes, then floated into position vertically one at a time, in the front view, using the up down arrows. Once I was happy I merged highest with the background.


The outside oval was created with a dome top and then textured using a bitmap from my TEXTURE MAGIC collection.


The scrolls were created as flat reliefs and then modified using the oval vectors. These will be routed separately and then glued into place.


The lettering was 'engraved' into the oval using the conic tool. The scroll and crown reliefs were raised to the full two inch depth of the bottom piece f Precision Board. Then the top layer of reliefs will be glued on after they are routed. I've decided to create the grape ;eaves by hand using sculpting epoxy.


Another piece is ready for the MultiCam.

-dan

Sunday, June 26, 2011

Shifting gears

Yesterday morning I finished off the mural in less than an hour, then spent the rest of the day helping a good friend finish theirs to completion. We laughed and talked late at a celebratory dinner among many of the other artists. And with that another mural project was brought to a close.


This morning I traveled to the airport early and rescheduled my flight to this evening instead of tomorrow morning. It meant a long eight hour wait at the airport, but that was far better in my mind than a twenty hour wait in a hotel room and getting up at six in the morning.

As I sit in Chicago Airport my mind races ahead to the Fox and Hounds Pub project back home. I had done one drawing on the plane down. It will feature 'Harold Fine Wines' in honor of the great contractor we are working with on the project. Harold, the owner and his crew have been so accommodating, seeing to our every need on the work site, eager to incorporate as many of our ideas as possible. With the pub owner's blessing this sign will hang as a tribute to him and his crew.

The quick sketch was scribbled into my sketchbook on my flight from Toronto to Chicago.I'll be building he whole thing, including the grapes inside EnRoute in the next few days.


Stay tuned...

-dan

Friday, June 24, 2011

Made in the shade!

Today it dawned gray with a slight misting rain, but by nine o'clock, after a leisurely breakfast the clouds began to part at last. We poured the coal to the painting process... at one point I counted 21 people with brushes in their hand slinging paint on the wall.


By the time it became too dark to paint the mural was largely complete. A couple hours tomorrow will finish it off and I'll breathe a sign of relief. 


-dan

Thursday, June 23, 2011

Not every day goes according to plan...

Today was one of those days when everything went smooth - except for the task I was supposed to be doing. Cloudy grey skies and steady light rain prevented any painting until around two o'clock. For two hours the rain let off... mostly. In that brief window there were a whole bunch of people who jumped up on the scaffolding to help brush on some paint. We managed to get a solid coat on the whole background before we ran out of paint. Before we could acquire more the rain had returned.


The local folks were out in force, encouraging the muralists and helping out in every way possible. This little lady took advantage of the puddles much to the delight off all who were there.


Tomorrow, the sun will hopefully shine bright.

-grampa dan

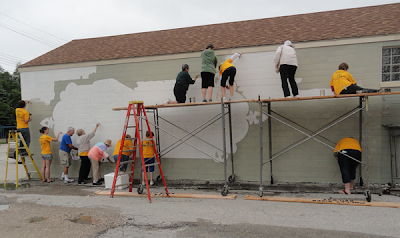
Soggy beginnings in Plymouth, Wisconsin

Two days ago I flew into Chicago, Illinois for a mural project in Plymouth, Wisconsin. The mural I am leading is one of twenty one murals to be painted over the next three days. One hundred and seventy artists have come from across the USA, Canada and beyond to do the project. It will be my one hundred and nineteenth mural.

We laid out the mural last night. getting a good handle on the project, right off the bat. This morning , very tired after my long trip, I overslept my alarm. But as I looked out the window the soft falling rain made it a moot point. It didn't matter. I'll spend the morning visiting with my many friends, waiting for the skies to clear. Then we'll paint long into the day and evening to make up for lost time.
Stay tuned for progress pics over the next few days...
-dan

Tuesday, June 21, 2011

Creating work on the fly.

I've never gotten used to the fact that I can have an early breakfast in our little town and lunch in a city on the other side of our continent. Add to that that I post this blog sitting at the airport, waiting for my plane. My computer isn't hooked to any wires, and the post will be instantly read around the world. It is an amazing world!

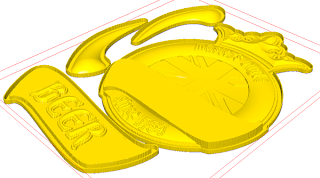
Today's file is another fictitious beer label, celebrating the story of the Fox and Hounds Pub. The horn's basic shape will be routed in Precision BOard and then a final skin of Abracadabra sculpt will be aded with the details. I suspect it will get lots of handling and this is the strongest way of doing it.


The preliminary artwork was done in Illustrator, the artist's concept in Photoshop.


I imported the Illustrator files into EnRoute and separated the layers as they would be routed. The two halves of the crown were joined and the two lower layers of the scroll added. The lettering borders and as well as the border around the crown were adeded as well.


Then I started building the reliefs - all separate so I could adjust their height before merging. The Union Jack was done as a simple modification of the center dished shaped circle.


Once I had merged everything I stated adding more details including the letter outlines.


I built the horn as a domed relief, then copied and flipped it so the two halves would glue together as a separate piece. The scroll will also be a separate layer. The bevelled lettering was the last step, making the file ready for tool pathing. Now the file is ready to be sent to the MultiCam and routed from a sheet of 1.5" 30 lb Precision Board.


It will have to wait until I return from my trip to the US. Stay tuned...

-dan

Monday, June 20, 2011

Routing to come later.

Another part of the project we are working on is the fireplace in the original pub area. The ceiling in this section is raised. We will be building a false London roofline in this area with seven or eight decorative (and slightly bent) chimneys poking upwards to the raised ceiling. Some bits like the chimney pots and mantle will be routed from 30 lb Precision Board. Some elements like the chimneys and 'brick facing of the fireplace will be carved from fiberglass reinforced concrete. For the slate roofs we had to put our thinking caps on.


After much thought we decided on 3/8" MDF for the colorful slate tiles. We cut them to random shapes and sized. In this shot Sarah is using the die grinder to create a beveled edge in a random fashion.


Then I taught Becky to paint from five different colored buckets of paint at once - and to leave bush strokes too. 


The end result is some pretty realistic slate roofing tiles. There are a ton of them required for this project - enough to keep the ladies busy while I am out of town for the rest of the week!


-dan

Sunday, June 19, 2011

Mantle ready for paint

Today I snuck out into the shop and spent a little more time with the die grinder on the mantle for the Fox and Hounds Restaurant. As I outlined in my last post I was adding the flat grain on the top and bottom. The gentle curves, thick and thin from end to end both front and bottom are pleasing to the eye. Things really flow nicely. It will get primer and base coat now but the final finishes will wait until everything around it is ready for paint.


-dan

Saturday, June 18, 2011

Restaurant centerpiece started

The fireplace in the new restaurant portion of the Fox and Hounds will be the next area to get our attention. The fireplace guy just finished installing a gorgeous little gas fireplace. Now we will build the decorative surround, mantle and trees that flank it. The whole project will involve a lot of different mediums. The trees will be sculpted fiberglass reinforced concrete over welded steel frames. The mantle will be carved 30lb Precision Board High Density Urethane. The large timbers will be sculpted concrete over wooden frames as will the brickwork and hearth.


I posted the creation of the EnRoute file last week. Today it was time to start putting it together.


The mantle was routed from 30 lb Precison Board. It holds detail extremely well and is still easy to work. Most importantly it is tough enough to stand up in a commercial setting like this. I built a plywood box, curved to shape. Over this I glued and clamped the Precision Board pieces.  The top and bottom pieces were 1" thick Precision Board HDU as well.


Once the glue had dried I could begin the hand work. I used one of my favorite hand tools - the air powered die grinder. I brought the grain lines over the edge of the corners and then carved in the flat grain on the bottom of the piece.  It didn't take long to do a sizable area. I'll finish the job tomorrow when the rest of the clamps come off.


-dan

Something fishy

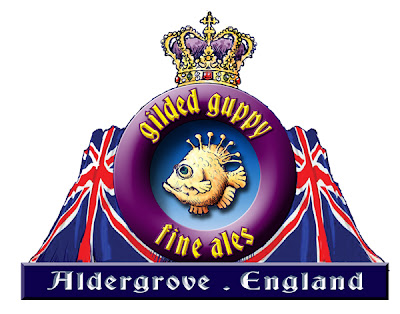
After completing the Laughing Tortoise sign I could hardly wait to get going on the next piece of pub art.It would be the gilded guppy ale sign. The owners has asked for the signs to reflect a whimsical English feel. This little fish (inspired by the art of James Christiansen) begged to be brought to life. The crown and Union Jacks give it the British feel. Our pub is in Aldergrove, British Columbia. On a whim I did a search and located three places in the UK that are called Aldergrove. This gave the sign instant credibility and made it authentic. The fish will be gold of course. I know it isn't a guppy, but then again it is not a real ale either.


The owners likes the flags so much we used then in a similar fashion on their main signs. Since I didn't want to repeat myself I flattened a single flag out for this sign. The vectors, created in Illustrator and EnRoute looked like this.


I showed the process of creating the fish in another post so I'll leave it out here. For the rest of the sign I separated the vectors to create the reliefs in two layers. The colored portions of the flag were added as raised reliefs - all of it flat. The round portion in the middle was subtracted from the relief and then a bitmap applied to create some texture in this portion. The crown was built as simple shapes and then modified with the oval around it. All the elements were built separately.


I wanted the flag to have a slight wave to it, higher in the middle. To do this I used a simple fade bitmap, created in Photoshop in a few seconds. The thing to remember is that black does nothing, white raises the relief to the amount you enter. Grays do in between, depending on their value.


The front view looked like this.


The finished file was merged together and tool pathed in readiness for the router. I can hardly wait to get started on the finishing...


-dan