Projects like the two signs I am doing for Cap-it really make me smile. It's a chance to really be challenged. I have to figure out how to use the software and router to make what I need. That's a challenge I relish! It is also a wonderful opportunity to mix and match different materials, power tools, hand tools and all manners of skills to achieve the end result I visualize. It is the perfect project to do as a demonstration piece for the Sign Magic Workshop. I'll be documenting it here too of course.
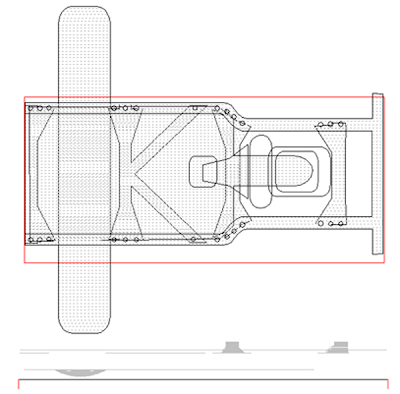
The next thing I am going to create is the truck frame. I'll use the same frame for both vehicles to keep things relatively simple. I've built a few hotrods in the past so I didn't have to do any research on this subject. It was built by eyeball alone. The vectors were created in EnRoute in only a few minutes. The large rectangles going in both directions would be used to create necessary bends in the frame. The frame was created upside down as we would be able to look under the truck as it will be mounted quite high on the displayed.
The frame rails were simple flat reliefs 1" tall. The cross members were 0.9" tall so they would tuck under the main rails. The floor pan was 0.3" thick. Then I created a separate relief with the dome tool using the horizontal rectangle. I then selected the two cross members I wanted to curve upwards and then the big rectangular shape. Bt merging highest The cross members instantly were curved perfectly.
Then it was time to do the rear floor pan and the rear of the frame rails. I created a concave shape with the dome tool and line it up with the top of the frame rails. Using merge lowest the frame rails instantly were curved downwards. I then nudged the concave shape downwards until it lined up with the floor pan and repeated the merge lowest procedure.
We were almost there in only a few steps. Then I used the various vector shapes with the dome and bevel tools to create the different elements of the engine oil pan and the transmission and transfer case shapes. The rivets on the frame cross members was the finishing touch for this stage. As simple as that I had my truck frames ready to tool-path and send to the MultiCam.
The frame was routed from 1.5" thick 30 lb Precision Board.
While I was busy creating the files for the truck frame the Router was busy carving out the massive wheels. And while the truck frame was being whittled out I glued the wheels up. This thing is going to make one eye catching display piece! Stay tuned for more progress...
-dan


