Our
TEXTURE MAGIC COLLECTION of bitmaps works really well, allowing us to achieve a whole lot of fancy and creative textures in a hurry. But many have asked me to work up more woodgrains for the next collection which will be released soon. I'm all ears. But I also wanted to take things a whole lot further to make the textures do much, much more. It is exciting to watch the new collection come together.
There will be lots of new woodgrains to choose from. But they will also be paired with some secondary bitmaps which will make the woodgrains much more believable. Special effects will also be possible with a third set of bitmaps in the collection to allow the wood to look twisted, warped or bent. Imagine what will be possible!
I tested the first set of bitmaps today by creating a name plaque for a new friend.
The thing to remember about bitmaps is that they work by reading the values. Black does nothing. While raises by the value you enter. Greys do something in between.
The bitmaps I used on this file are below. The top one was used to warp the board. The middle bitmap were used to enhance and add the character of the woodgrain on the bottom.
To start creating the file I first opened the bitmap files. The thing to remember in using multiple bitmaps that must be matched is that they need to be resized at the same time to maintain their proportions. I used the bottom woodgrain bitmap as a reference as I drew out the board vectors. I wanted this board to look weathered and old.
Because I would be warping the board I created a second rectangle which I would use to build a separate relief and warp the to match the board. The lettering would be built up from this surface and then merged with the warped board. This way the two surfaces would match. The rivet band relief which would go along the right edge was also built separately and warped with the same bitmap.
I used the distort tool to wiggle up the rectangle and rivets. This would make them instantly old when I created the relief.
With the vectors complete I started making the simple flat reliefs. I started with the board.
The relief which I would build the lettering on was next.
The rivet band was last.
I then positioned the twist fade over the reliefs and applied it to all three of the reliefs. The resulting twist was subtle but most visible in the 3D render.
Next up I used the prismatic tool to modify the rivet band relief and create the rivets
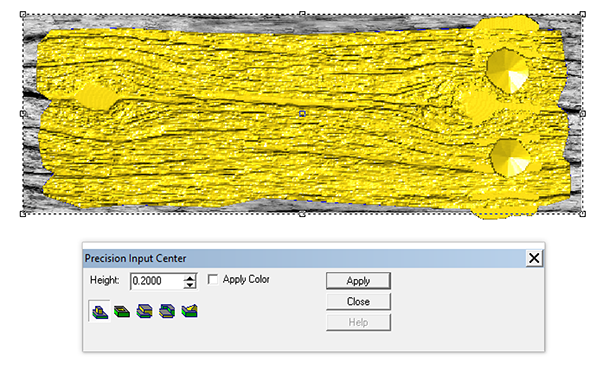
The woodgrain was then applied to the biggest relief.
The woodgrain looked good but was naturally flat.
The paired relief which created a much more weathered and textured look fixed the flatness in a hurry!
I then added some weathering to the rivet band using the splotches bitmap (from the original collection)
I checked the end view to see how much the rivet band was sticking above the weathered wood. The twist of the board is evident in this view.
I then modified the rectangle relief by raising the lettering outline. It protruded through the woodgrain.
Once I had checked it and nudged it (up or down) appropriately in the front view it was time to MERGE HIGHEST with the wood relief. I also combined the wood and rivet band reliefs.
The lettering was then created by modifying the base relief using the lettering vectors as a mask.
Using those same lettering vectors I added the splotches bitmap to the lettering surfaces.
The file was then ready for tool pathing and was sent off to the Multicam to be cut from 1.5" 30 lb Precision Board. Once it was cut I used an air powered die grinder to add texture to the edges of the board plus cut a hole to create a knot hole in the board. It only took about five minutes to get the board ready for the hand sculpting, paint and gold leaf. Stay tuned for those steps.


